Internal Resources
All tools below are installed on the Linux machines of the DIVMS labs. To use those installations, you need first to log in to a lab machine either locally or remotely with the NoMachine client (see the CSG Linux help pages for the latter).
Scala
UML
- Violet diagram editor
Scala Interpreter
Working with the Scala interpreter on the CS Lab machines
-
Open a terminal, for instance by selecting Applications|System Tools|Terminal from the top menu of the Gnome Desktop.
-
At the terminal's prompt enter:
scala -
You can now interact with the interpreter by entering any Scala code you wish.
Simple Build Tool
Creating a simple project with SBT
-
First create a base directory to store the contents of your project,
for example <base-dir>.
-
Add all source files you wish to include in your project to the directory
<base-dir>/src/main/scala.
-
In <base-dir> create a file called build.sbt.
This file will contain build settings for your project.
- Edit build.sbt in your preferred text editor.
A build.sbt file is a set of key-value pairs describing various configurations of your project. Values are associated with a given key in the build.sbt file using the following syntax key := value .
Typically three key-value pairs are always defined in build.sbt:
- name,
the name of you project;
- version, the version of your project; and
- scalaVersion, the version of Scala to be used with your project.
- version, the version of your project; and
   name := "Hello"
   version := "0.1"
   scalaVersion := "2.9.1"
SBT also allows users to indicate library dependencies for their project. These dependencies can be defined by adding the following in build.sbt:
libraryDependencies += <groupId> % <artifactID> % <revision>Note that the operator += += appends a library to the previous value of the libraryDependencies attribute than replacing it as would be done with :=.
Check the External Resources section for more information of how to set up build.sbt.
Working with SBT on the CS Lab machines
-
Open a terminal, for instance by selecting Applications|System Tools|Terminal from the top menu of the Gnome Desktop.
-
At the terminal's prompt change to your sbt project directory, for example:
cd <project-name> -
At the terminal's prompt enter:
/group/class/c_022/sbt -
Running sbt like this will start it in interactive mode.
SBT Interactive mode
When using SBT in interactive mode users are presented with a command prompt where they can enter a variety commands. The most useful commands for the purposes of this class are:
- compile
- Compiles the main sources of your project.
- run
- Runs the main class of the project.
- test
- Runs any tests defined in the subdirectory src/test/scala/ of your project.
For convenience sbt also allows commands to be automatically rerun whenever a source file of the project is modified. This is done by prefixing a given command with ~. For example,
~ compilewill watch for changes in source files and automatically recompile them accordingly.
ScalaEdit
ScalaEdit is a simple IDE for Scala that provides source creation and editing functionalities, syntax highlighting and compilation and testing via an integration with SBT.Working with the ScalaEdit IDE on the CS Lab machines
-
Open a terminal, for instance by selecting Applications|System Tools|Terminal from the top menu of the Gnome Desktop.
-
At the terminal's prompt enter:
/group/class/c_022/scalaedit
Using SBT within ScalaEdit
ScalaEdit has some integration with SBT. It allows you to open one or more SBT terminals internally by selecting Terminal|SBT Terminal|Version 0.11 from its top menu.
ScalaEdit maintains at all time a root directory for a Scala project. The root can be (re)set by selecting Project|Change Root... from ScalaEdit's top menu.
When you open an SBT terminal, SBT will be set up automatically to use the current ScalaEdit project root. If you change the project root in ScalaEdit, however, you must open a new SBT terminal to work on that project.
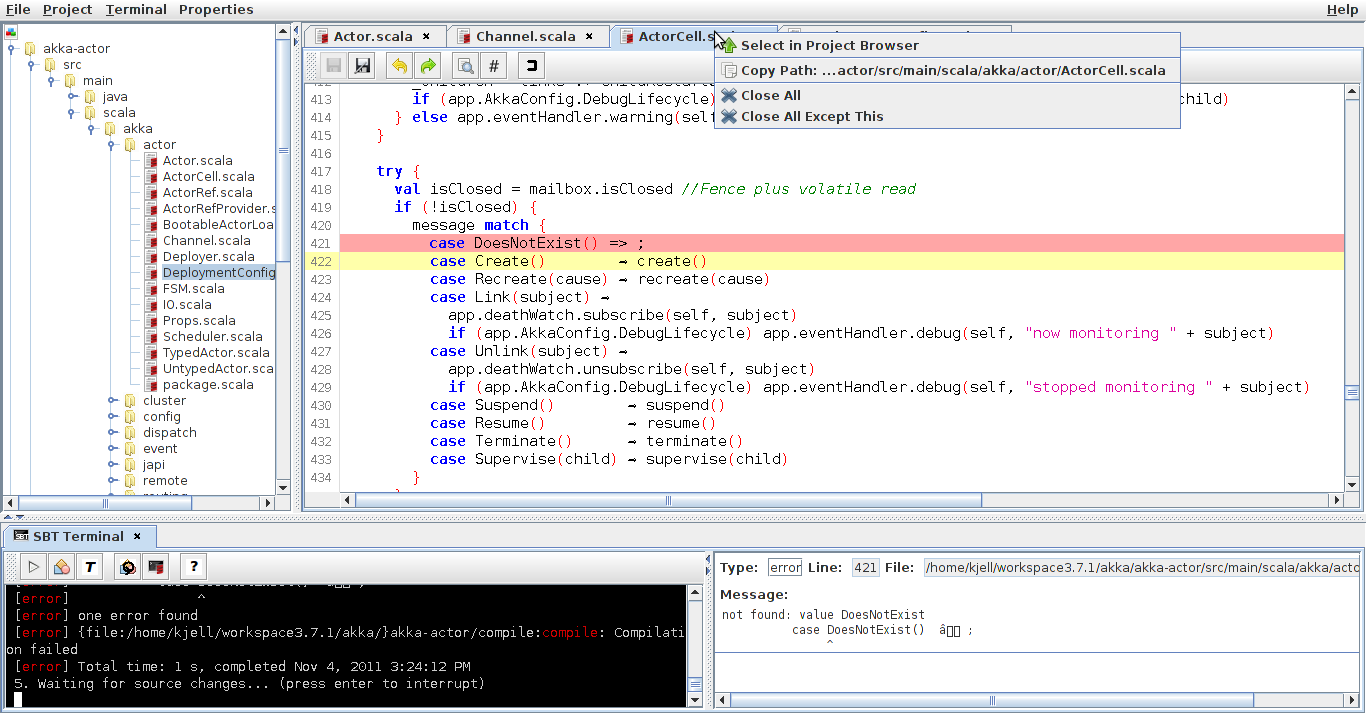
If running compile in an internal SBT terminal produces errors, ScalaEdit will present them in an adjacent window. Clicking on an error in that window will move the cursor in the text edit window to the error's location in the source file (as seen in this screen shot).
Using the Scala interpreter within ScalaEdit
It is also possible to open one or more terminals running the Scala interpreter by selecting Terminal|New Scala Terminal from ScalaEdit's top menu.
jEdit
Working with jEdit on the CS Lab machines
- Select Applications|DIVMS|Computer Science|jEdit from the top menu of the Gnome Desktop.
Installing the Scala plugin for jEdit
The user must manually install the Scala plugin for jEdit since it is not present by default on the DIVMS lab machines.
-
Select the Plugins|Plugin Manager from the
jEdit menubar.
-
Click on the Install tab and scroll down
until you encounter the plugin named Scala (this should
appear under the Name column of the Plugin Manager
window).
-
Mark this plugin.
The Install button found at the
bottom of the Plugin Manager window should now be
highlighted.
- Click this button to install the Scala plugin for jEdit.
Using the jEdit Console
A user can use the jEdit Console to invoke the Scala interpreter or Scala's Simple Build Tool.
Opening the Console
Select Plugins|Console|Console in the jEdit menubar. Once open, you can interact with the Console similarly to how you would a Unix terminal.
Copying text from the text window to the Console
You can copy selected (highlighted) text from the text window to the console, as seen in class, by saving this macro file as~/.jedit/macros/ToConsole.bshIf you invoke jEdit after that the macro ToConsole will appear in the Macros menu in the top menu bar. Right-click in the text window and choose the option |Customize this menu ...| to add the macro to that menu.
Anchoring the Console window to the text window
-
Open up the Console window as you would normally by selecting Plugins|Console|Console in the top menu.
-
Click the downward facing arrow in the top left corner of the Console window.
- From the menu that appears select Dock at Right.
Running the Scala interpreter within the Console
To run the Scala interpreter on the file you are editing,
-
change to the directory where the Scala file is located by issuing the
command cd <dir>. Here, substitute <dir> for the
directory you wish to change to;
- invoke the Scala interpreter on a given file by giving the command scala <filename>, where <filename> is the name of the file you wish to interpret.
As an alternative, you can also start the Scala interpreter using the command scala and then copy and paste from the jEdit editor window as desired.
Running the Simple Build Tool within the Console
To run the SBT tool on a specific project,
-
first change to the the root of the project directory
by issuing the command cd <dir>,
where <dir> is the project directory;
- next invoke start the Simple Build Tool using the command /group/class/c_022/sbt
Violet
Working with the Violet UML editor on the CS Lab machines
-
Open a terminal, for instance by selecting Applications|System Tools|Terminal from the top menu of the Gnome Desktop.
-
At the terminal's prompt enter:
/group/class/c_022/violet