Borland Together
Borland together is a sophisticated CASE tool implemented as an Eclipse plug-in. We will use it mostly to write UML class diagrams and related OCL constraints.
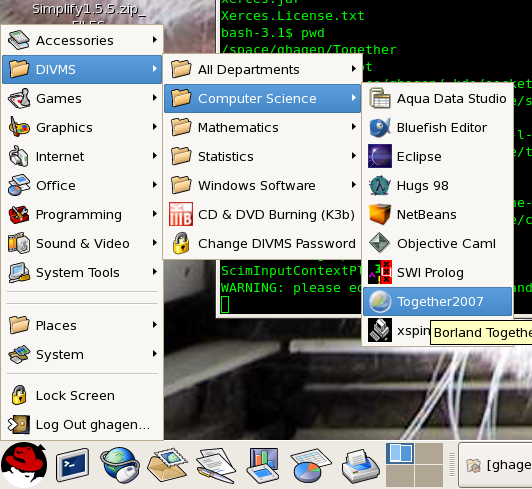
How to run Together 2007 on DIVMS Lab Computers l-lnx*.cs.uiowa.edu
- To run the Together IDE, press the "redhat" button, then choose Applications -> DIVMS -> Computer Science -> Together2007
- Note that Together may overwrite your Eclipse configuration! Use separate workspaces for Eclipse and Together to avoid potential corruptions.
(If you don't use Eclipse for any other courses, ignore this.)
- Also note that we only have 15 concurrent licenses for the software. If all licenses are in use, you will not be able to run Together. Please work in groups whenever possible and please do not leave the program running if you are not actively using it.
Accessing Together remotely
If you want to run Together from homw you must access a lab workstation remotely. For that, use the NoMachine NX client, available from the CSG pages:
Generating a simple UML diagram in Together
The first time you run Together, you will first see a popup window asking for the location of a working directory. We recommend that you specify a new location such as, for instance, Together-workspace.
Similarly you will probably see an "Welcome/overview" window introducing you to Together. Feel free to look around; once you are done, close the window (using the "x" on the tab), then...
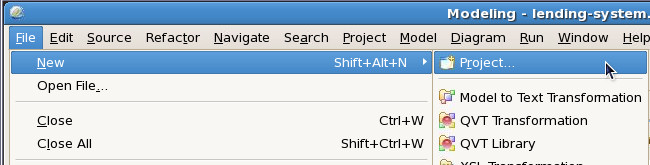
- Choose File -> New -> Project
- In the "Select a Wizard" window, click the triangle next to the Modeling folder to unfold it. Then choose UML 2.0, and press "Next"
- Give your project a unique name and press "Finish"
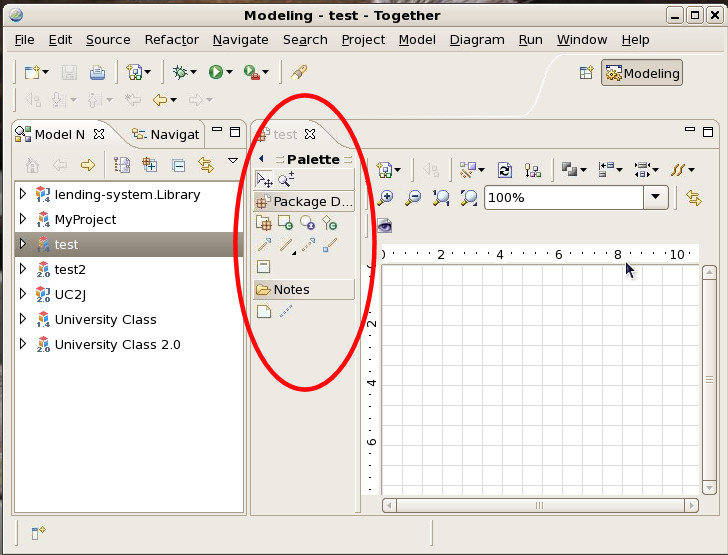
- If the blank Class Diagram does not immediately appear, double click on the name of your new project in the left-hand list. Once there, take a look at the tool palette (circled in red here).
Adding a class:
- Click on the Class tool (Box with a "c") in the palette, then "paint" a class box on the diagram: click on the diagram and drag, forming a box
or right click on the diagram and choose "New -> Class"
- Give the new class an appropriate name by clicking on its default name.
Adding an attribute or operation to a class:
- Right-click on your class box in the diagram, then choose "New" and pick "Attribute", "Operation", or the like.
- Specify the name and type(s) of your new attribute or operation.
Adding an association (generalization, etc) link:
- Click on the Association Link tool (solid diagonal line) in the palette, then click on a class and drag the cursor to another class. If you do not choose a valid target in this process, you will be given a list of possible items in the diagram you can link. The first class you click on is the "Client", the second is the "Supplier".
- To change the multiplicity or label of the link, right click on the link and then choose "Properties"
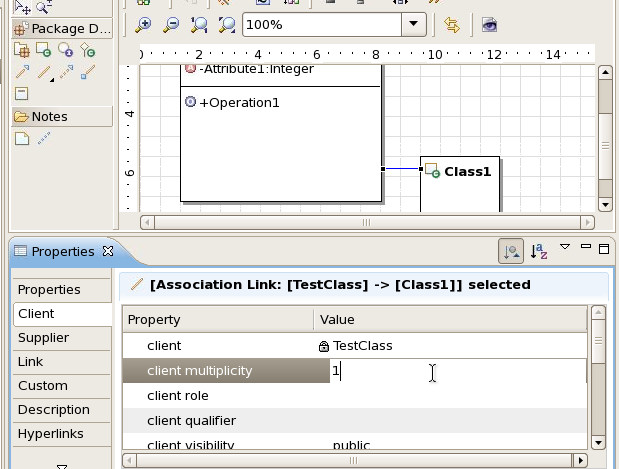
- Here you can modify things such as link names, labels (which shows up in the diagram), multiplicity, and other attributes.
Adding OCL invariant to classes:
- Click on the Constraint Link tool in the OCL Element part of the palette, then click on a class and drag the cursor to an empty space of your diagrams and click again. This will create an empty OCL constraint and link it to the class.
- To add OCL text into the object, click on the constraint box and then choose "OCL". Then click the value of the "body" field to add the contraint.
- The constraint should start with "inv:" followed by an Boolean expression for the invariant.
Adding OCL preconditions and postoconditions to operations:
- Once you have created an operation in a class, click on the operation.
- Click on precondition and choose ocl as a value for the "language" field.
- Add a Boolean OCL expression into the value of the "body" field.
- Postconditions are added similarly.
Importing a Together projet into your workspace from a zip file
- Choose File -> Import
- In the "Select a Wizard" window, click the triangle next to the General folder to unfold it.
Then choose "Existing Projects into Workspace", and press the "Next" button
- Click on the "Select archive file" buttom and type the file path, or use the Browse bottom to locate the file.
- Select the project from the Project pane and press "Finish".
Exporting a Together projet from your workspace to a zip file
- Select the project and then choose File -> Export
- In the "Export" window, click the triangle next to the General folder to unfold it.
Then choose "Archive File", and press "Next"
- Input a destination folder and a name for the file.
- Choose the options "Save in zip format", "Compress the contents of the file" and "Create directory substructure for files".
- Press "Finish".